Wednesday, October 29, 2014

Airbrushless Camo

I picked up a great hobby tip from a fellow Flames of War tournament player back in February at GenghsCon 2014.  I was commenting on his wonderfully painted German army and happened to ask about the camouflage on the armor assuming it was done with an airbrush.  To my surprise Ian proceeded to describe how it had all been done with chalk and a cut down paint brush.  It had a very nice soft edge unlike many brushed on schemes.

Sorry, the photo just doesn't do any justice to the work.

I was never able to get a good photo from him but I did find one I snapped with my phone.  It's poorly shown above zoomed and processed.

Admiring his army very much I decided I'd make an attempt.  I've resisted getting an airbrush for various reasons and as such have been rather slow to paint late war German vehicles.  I have an entire German Armor company I am working on and some Open Fire StuG's that have been sitting in Dunkelgelb for more than a year that are badly stalled because of my caution to paint late war camouflage without an airbrush.

Never the less I wanted to give this a try on a single vehicle and I thought I could give it a go as a support vehicle for my 15mm German Bolt Action force.  I chose a recon vehicle with the HE (High Explosive) stat for extra pinnig power, the SdKfz 223.  I even found a picture of the Fallschirmjager riding with the reconnaissance battalions in Italy as some sort of historical justification for having it in the list.

shhhh! My FJ force is for Normandy not Italy...and that's an MG not the cannon version
First I picked up a cheap set (~$5US) of chalk pastels at Michael's.  Be careful not to get the oil based pastels, you want the chalk type to give you a nice soft edge.

Lots of extra colors for the kids
Next match up as best you can the colors for late war camouflage.  Take some fine sand paper and grind down the chalk into a fine powder.

It's going to have to be close enough.
I took an old brush #2 and cut it down to a stub.


The model is primed black, drybrushed with Vallejo Middlestone several coats and highlighted with 50/50 Middlestone/Buff.  Now take your powdered chalk and paint/stipple on the camouflage pattern you want.


Here is where I thought this was a partial fail.  The chalk just didn't stick as well as I'd hoped and was not bold enough for my taste.  To fix that I took some paint (Reflective Green and Camo Medium Brown) and did a very small amount of stippling in the center of each swath of camo ala Jon of WWPD's method.  I think that helped to correct the color a bit as well.  That is followed up by a overall magic wash (brown ink with Future floor polish), decals, details, crew, and minimal weathering with acrylics.  I also tried for some dramatic edge highlights that I thought came out pretty good.

A little HE coming soon to the Bolt Action table

The wheel is NOT crooked, the terrain is uneven

It's a very soft and worn look, perhaps I should add some chipping next time

That's it, not too exciting but a method that I think has some potential.  I'm unsure if it would be any easier than the WWPD technique but I think it might be a little more forgiving than the all acrylic's method.  I think the stubby brush is the way to go along with mostly stabbing and stippling for the effect.

I'm back to painting a bit and am working on a few more posts so I hope to have some more to share very soon.  Be sure to add this blog to your reader and drop me a note (even if you hated it).  Stay tuned.


Tuesday, September 9, 2014

US 1st Armor in North Africa

I've always wanted to expand my US armor collection to include more of the tank models used in the early part of the American fight against the Axis.  I've played Mid-war Flames of War before and always used my late war kit but somehow it just didn't feel right.  After deciding to play in this years TactiCon in Denver I set about collecting and painting models that would scratch the itch I had for something "not a Sherman".

I decided on these 3 vehicles, believing they represented US Armor in North Africa.  I was thinking my force was going to be something that might have seen action during the Battle for Kasserine Pass.

M3A1 Stuart, M3 Lee, M8 Scott
After spending considerable time painting I discovered in the unit history phase of my project that my perception was off by a lot.  I had always assumed that the Lee was the main battle tank of North Africa but in reality the Sherman was more common.

1st Armored division "Old Ironsides" was composed of 2 Armored Regiments, the 1st Armored Regiment and the 13th Armored Regiment.

The armored Regiments possessed the standard 3 battalion arrangement used throughout the war with one Battalion made up of 3 companies of light tanks (Staurt's) and 2 Battalions of 3 companies each made up of medium tanks (Sherman's and Lee's).

My research consisted mainly of what I found online including Battlefront's host of articles about the US in North Africa.  I also decided to purchase a book to assist with the modelling efforts.  Under the Gun 2: First Blood US 1st Armored Division in Tunisia from Oliver Publishing Group was very helpful with unit organization and markings.  I really wanted to have tanks with the iconic yellow stars and stripes!  This book has many pictures of destroyed and captured US armor in Tunisia along with some full color renderings that were very helpful.  Much of the book material came from captured German photographs at the end of the war which were made by the Germans following the disaster at Kasserine.  Shown below is the famous Stuart, REBEL, which was captured intact.


After getting nearly done painting and having finished most of my research I was faced with the conclusion that the army list I made for the tournament was nothing at all like what was at Kasserine or perhaps at all!  The North Africa book is very generous for US Tankers allowing you to mix and match light and medium tanks.  In reality the TO&E's are like late war with companies that are comprised of 3 platoons of either light or medium tanks.  I also discovered that the Lee's I so desperately wanted to field were probably only in the 2nd Battalion of 13th Armored Regiment which was not present for the battles of Kasserine.

So what's a Flames of War list builder to do?  I decided to chalk it up to general quarkiness of open format tournaments and run with my list anyways.  I would be facing Panthers, Churchills, and Soviet Tankovy after all so who cares, right?

I settled on this list:


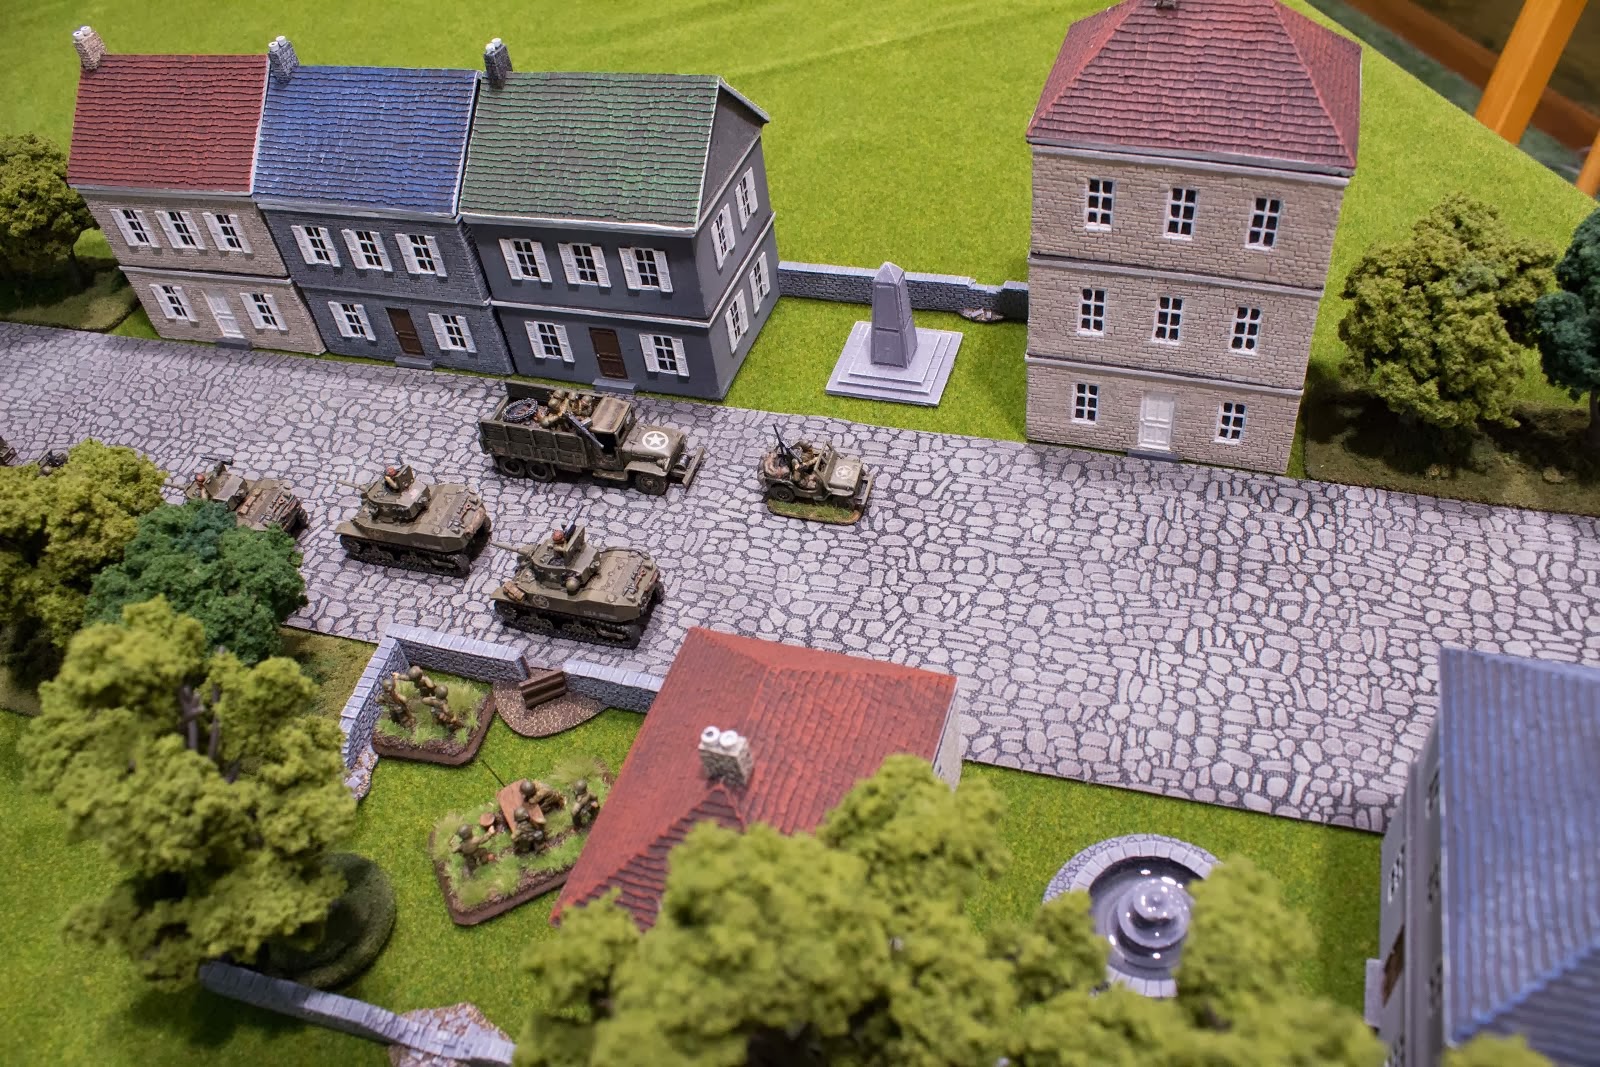
First up I needed some jeeps to make a security section for Tank Destroyers in North Africa.  I used M10's previously painted and featured here.  It's too bad that Tank Destroyers are pretty much compulsory if you want to have any hope of going up against heavy tanks with an armored company.

MG's on the right and left are magnetized for optional use.
I use the smallest star decal on bases to mark platoon commanders.  He's also the only guy holding binoculars.
Next up is the M8 Scott.  My research showed that this guy was not present until the late phase of the Tunisia campaign.  I painted him up anyways in more of a late war scheme thinking I might get some utility out of them there.

Platoon commander again with binoculars.  He is from a half-track crew.
I like to identify the commanders as much as possible so he also got a flag decal and some stowage on the turret.
This unit presented some interesting things in use and I do not think it is an optimum choice.  I intended for them to be a direct fire smoke platform to roll with the tanks.  They got destroyed in every game where my armored mortars did not.  Having only 3 teams makes them susceptible to cowardice and leaving the battlefield.  Being fast and tracked seems to represent a big threat because my opponents always keyed off on them.  They are better kept safe in the rear truly but in that case I think there are more efficient use of points for smoke.  The jury is out, I may have to do up 3 more and try running them as a unit of 6 in late war, though they lack smoke bombardment in that period.  The half-track assault gun platoon is the more historically accurate choice for Kasserine.  

When I decided to attend TactiCon I was not quite sure what the list would be so I bought a platoon of each tank type I wanted to use and an additional pair to use for my Company command teams.

First up we have the M3 Stuart HQ teams.  Hooray for yellow Stars and Stripes!  They are decals from I-94 Enterprises and they are wonderful.  I love the Battlefront decals and these are every bit as good.  They actually come off the backing easier than the Battlefront ones and had no silvering.  There are also a mixture of US flags I used from Battlefront and MustangGameSystems.  The blue vehicle identification numbers are I-94 as well.

Do I look dusty?

I don't feel dusty.

Do these gas cans make my tracks look big?

We're not talking!
 A full platoon of Stuarts to go with the HQ.  I really wanted to run 5.  I never have much luck with trained light tanks so I wanted as much durability as possible for casualties or maximum assault capability.

I took license to put the star on the front deck.  No photographic evidence known.

The platoon commander is the tank with the figure.
I did run into a good amount of other light tanks and in hindsight the M5 with 1 more point of front armor is a pretty good choice as well.  It didn't feel mid-war enough for me so I used these with stabilizers.  The M5 did see action in Tunisia as replacements for these M3's but it was late in the campaign like the Scott.

I really wanted Lee's.  They are goofy and I like them.  They have a main gun like the Sherman plus the turret mounted Stuart gun both with stabilizers!  The turret has rate of fire 3, I suppose due to an extra crew member (loader).  Here is the HQ I used.

Dang we are up high!

Long barrels here.
A platoon of Lee's shown with the long barrels.  All the barrels are magnetized so I can switch them into short barrels.  The short barrel with a muzzle brake was used later to correct some serious recoil and vibration issues.

Oh say can you see.....
...my super dusty...

...hull and running gear...

That wraps up my North African foray.  It ended up being 17 tanks and 3 jeeps, basically a new company of tanks.  I plan to revisit north Africa someday and add half-track assault guns and white scout cars that I already own.  I'll probably add another platoon of Stuarts or Lee's sometime in the future as well.  I can only imagine when Battlefront revisits mid-war the flexibility of mixing light and medium tanks will probably be removed as they update to more historically accurate force organization diagrams.

My apologies for the mediocre photography.  I still haven't got it mastered.  I like taking pictures of everything in action, on the game table but, my lighting and or lens aren't not up to the level as other hobby bloggers.  These photos were taken in an ad hoc lightbox arrangement.  The single color ground and backdrop mess with colors, lighting, and focus.  I haven't quite decided what to change, make, or purchase to improve my results.  I'm leaning toward a new lens and some additional lighting for the game table so I can return to taking pictures of my hobby results in the field.  The lighting will improve the game room generally and a new lens will improve my photographic options all around.

If you stopped by please shout out about the miniatures, the list building, photography, or whatever.  But whatever you do, be sure to follow me by clicking the Join this Site button and add me to your blog reader!  There is more content to come as I publish my backlog of summer projects!


Wednesday, June 18, 2014

Getting into the Action

Greetings, the blog has been a bit light on material lately and I have fell short of my goal of posting twice a month.  Fear not, I'm back! and I am not giving up on posting twice a month.  It's just that at this point it will have to be an average for the year so I'm revising my goal as such that I will bring you 24 posts for the year.  I think I can still pull it off.

The reason I have been absent is that I have been vacationing a bit and doing a number of family activities along with general summer distractions.  I've also spent a good amount of my hobby time playing games which is always nice.  Instead of spending the remaining hobby time blogging I have been feverishly working on a project I started over a year ago.  I gave a sneak peak back in April with my Covering your Bases article.

Today I bring you Getting into the (Bolt) Action.  The first half of my Bolt Action project in 15mm.  I've completed my first force of infantry, a reinforced platoon of German Fallschirmjager troops depicted with late war (1944) battle gear and uniforms and based to fight in the fields and hedgerows of occupied France.


For starters this is an all infantry force that I worked up from the core rule book.  I went over to the Bolt Action EasyArmy site to make up my list and came up with a couple versions.  I have painted more troops then needed to compile the list but will go ahead and show them to you based on this list.

Veteran First Lieutenant and 1 additional man, 103 points.
I'm going with veterans for the most part because I want the 5+ to kill stat.  They will be more survivable.  I'm showing a pistol equipped office and a rifleman here but when game time comes they will likely be substituted with assault rifle equipped men.  The weapon type is points free and I have extra assault rifles.

1st Squad (8 men): Veteran NCO and 6 additional men equipped with assault rifles, 1 man with SMG and panzerfaust, 147 points
These guys are some assault monsters or can pour out a good base of fire.  Within the force all the assault rifle equipped men have orange flowers on there bases to help with identification.  It's much harder to see the weapons in 15mm so I came up with this basing convention.  SMG's have white flowers and panzerfaust's get purple.

2nd Squad (8 men): Veteran NCO and 2 additional men with assault rifles, 4 riflemen, 1 man with SMG and panzerfaust, 127 points
This is a multi-purpose squad capable of assaulting or shooting.

3rd Squad (8 men): Veteran NCO and 1 additional man with assault rifle, 4 riflemen, LMG with riflemen loader, 134 points
I am definitely in the "LMG's suck" camp but I have the models and don't want to be too gamey.  They have some merit so I have included one in this squad.  The next picture shows how the loader can be removed as a casualty as needed.

Removable loader
4th Squad (6 men): Veteran NCO and 1 additional rifleman with 2 LMG's with riflemen loaders, 118 points.
Here is an ad hoc squad the platoon leader could have plausibly put together as a base of fire.  This gives me a good amount of ranged fire with out the fixed penalty of a MMG.  Again shown with loader casualties below.

The loaders have magnets in their bases and the LMG bases are steel washers.
Veteran Artillery Forward Observer with extra man, 128 points.
I went veteran because they are ridiculously priced and I don't want them getting wiped off the board. My reading on the WWPD forum is that many people consider the points spent on these guys to be better used for a vehicle.  Again shown with casualty marker.


Inexperienced Medium Machine Gun, 35 points
This is the figure that started it all.  What can I say?  It's basically an order die.  Maybe the long range will keep them out of harms way.


It was fun to model and paint and I really like how it turned out.  Shown here with casualty figures.


Inexperienced Medium Mortar Team, 35 points.

I had fun with these guys.  I had the large mortar left over from a mortar platoon of stummels I did for Flames of War.  The seeming loader is an extra panzerschreck loader.  I was able to reform the projectile to look more like a mortar round.  The guy standing is actually a Heer vehicle figure.  I gave him a head swap and I actually took green stuff and formed around his legs to reproduce the jump smock look.  All in all I think he turned out pretty good.  The guy crouching low is an extra gunner from a machine gun platoon.  He looked like he could be reaching for ammo just as well as pulling a trigger so I used him.  Here shown as casualties.


The inexperienced mortar team seems to be scorned as an army choice but I'll take pride in deciding to use him that way before having read about the ridicule he gets on the forums.  Needing a 6 to range in on the first attempt precludes spending much more on him than that.  It's a reserve unit or an order die or just something to make it a more cohesive or historic seeming outfit.

Regular Sniper team, 50 points
Watch out enemy officers this guy is gunning for you!


That brings the total to 999 points!  I've got a couple other versions of the list including one that contains a vehicle which is planned to be the focus of a future blog post.  You really ought to be following me!

I also have a bunch of other guys that did not make the list.  There is enough infantry men to field a couple more squads, an extra officer, or maxed out squads.  With a couple vehicles I could easily field two platoons using these reinforcements.

2 more squads worth
Many of you will be familiar with the sculpts.  The figures are all from Battlefront and I have less than $50 invested in the force.

I had a lot of fun painting these guys and learned a bunch.  There are definitely some things I'd like to do differently but I have a lot of time into them already and I don't think it will matter much when it comes time to fight with them.

One of the things I would like to do differently is try to paint the splinter camouflage more representative of the actual look.  As is turns out I basically just put slashes of paint on to simulate the colors, it doesn't look very nice with close up photography but is alright in aggregate as a force.  Some day I'll get around to trying to paint realistic faces and flesh.  I'd also like to spend some time making the rifle wood more lifelike and try some non-metallic metal some day.

I'm done with these guys for now and I'll be moving onto some other things for now.  I'll finish up one vehicle for them pretty soon and get to their opponents, American Riflemen, as the year progresses.

I'm still not getting the photo's to turn out as well as I like so I'm going to keep working on that.  Stay tuned!


Thursday, May 15, 2014

US 3rd Infantry Division dismantle Gustav Line - a FoW AAR

Gwen and I decided to give the new lists out of Battlefronts Italy compilations, Road to Rome and Fortress Italy, a go.  Gwen was excited that her Gebirgsjäger company could now be fortified and I was excited at the prospect of matching that up with some of my engineers.  So we decided to play a fortified engagement where I would use US 3rd Infantry with an assault platoon and engineers and her a super secret Nazi mountaineer company.

Gwen's German's.


Gwen's stuff is always expertly painted.

The infantry portion (with attachments) of my Rifle Company from 3rd Infantry Division.  You can see my Field artillery battery here if you like.

Infantry, recon, and an experimental borrowed AOP. I forgot to bring mine.

HQ (15) + 2 Bazookas (40) 55
Rifles 2 Squads + 1 rifle 165
Sharpshooter & SMG 15 
Assault Platoon 2 squads 180
MG Platoon + 2 bazooka 170
A&P Platoon 3 squads + 2 Bazookas 205
Intelligence & Recon 85
Cannon Platoon 2 Priests 125
Field Artillery 105mm 185
AFAB: 3 Priests, Sherman OP, half tracks & MG 230
Stuarts qty 4 210
AOP 25 
Grand Total 1650

I attach as follows: 

Rifle Platoon: 7 Rifles+cmd+bazooka+2MG+1MGBazooka = 12 teams
Assault Platoon: 6 Rifles+cmd+bazooka+2MG+MGBazooka+HQ Bazooka = 12 Teams
Ammunition & Pioneer Platoon: 6 Rifles+cmd+2 Bazookas+HQ bazooka = 10 Teams

Gwen attaches her HMG's.  

The battlefield:

Gwen's terrain is always beautiful..

 We roll up Breakthrough and Gwen selects the left near and far right to deploy in and I select the near right vineyard to deploy in.

Obstacles go down:


Followed by objectives.

The Americans are a little blurry from the vineyard.

My Rifle platoon goes in reserve.  Gwen deploys on the two hills:

6 Heavy Mortars, Italian Tanks, and Infantry on the left hill.

88's and medium mortars on the right hill.

One platoon ready to race to the Objectives.

I set up my artillery batteries and infantry ready to push off toward the 88's on the right.  Stuarts behind the wall (middle left) to challenge the heavy mortars and Semovente's.


I push out truscott trotting my assault platoon and moving the A&P platoon through the woods.


Stuarts move up the left side.


Recon sneaks up the middle looking for something to reveal.


The Americans open with a devastating bombardment against the heavy mortar and tank position but fail to range in.  The big template does not come out again.


Recon draws first blood knocking out a stummel near the 88's.


Gwen races to the objectives.


Her x2 shooting from the 88's pins the Assault platoon, the HMG nest pins the A&P platoon, and the recon gets bombarded, takes a casualty, and gets pinned.


The A&P platoon proceeds to spend all but the last turn pinned in the woods.


The semovente's score some hits but fail to destroy any Stuarts.


Back on the right the Assault platoon unpins with the help of the CiC, clears one minefield, surges up the hill toward the 88's, and gets pinned again from shooting. The Cannon platoon of 2 Priests take shots at the 88's and knocks one out but subsequently get obliterated from the remaining 88's return fire.


105's pound german infantry making for the objectives via an air observer and repeatedly target the German armor and heavy mortar positions to small effect.


On the left the Stuarts work over some heavy mortars with shooting and a successful assault followed by a consolidate up the hill toward the German armor.


The Gebrigs Assault platoon moves to dispatch the Stuarts but fails to connect with the speedy light tanks.  All the practice in North Africa and Sicily has taught these veteran tankers how to effectively use their stabilizers and the lightly armored Italian tanks start to burn.


Back on the right the US Assault platoon takes casualties but continues it's surge up the hill, with the help of a Sherman artillery observer, eliminating the threat of the dreaded 88's.

Where are those damn Engineer's?
Low and behold the flanking Rifle platoon must have found a way to sneak through the line and arrives in the most timely fashion (turn 3) to shoot the German's before they can complete their foxholes.  The AOP continues to call in strikes against infantry on the move.

Who is that lone man (bottom center)?  Is that the German commander?
 The causalities start adding up fast for the Germans. Artillery is really sticking it to the German's constantly pinning them down and whittling away at their fighting strength.


Veteran US riflemen unpin the following turn and surge across the poorly constructed defenses pulling off a successful assault on the mountaineers guarding the objective.  They win the assault but are unable to push them off completely.  The objective remains contested.


 Back on the right the Assault platoon is mopping up the German strong point and making its way to the objectives.  The terrain and obstacles have these guys way behind schedule even with the CiC driving them forward (unpinning) each turn.


On the left Semovente's and Stuarts mix it up as the first US tank goes up in flames.


Back at the objective the German's plan a desperate close combat counter attack but the American defensive fire is too much and the German will to live is kaput.


Things look pretty bleak for the lone German commander.  One German infantry platoon is destroyed.


 The armor duel rages on with the Germans knocking out another Stuart and US bombardments evening the score.


The field of battle is strewn with dead from both sides and in the chaos the German CiC sneaks away continuing to hold the objective.


The Americans are pushing on all fronts now.  After the Assault platoon did all the hard fighting on the right the Engineer's and Recon finally decide to get moving again.  2 more Platoons (88's and stummels) have been destroyed at this position.

Like the Engineer's the unarmored recon spent multiple turns pinned.

The combined effect of multiple turns of bombardments from one or two howitzer batteries and stabilized Stuart main guns finally finish off the Italian tanks.  The Germans have lost over half their force.

Note the Stuart in the top right, he'd been bailed out for a few turns and once into the fight stayed put and just shot.

The riflemen launch a final assault against the German commander...


...and discover he is a horribly deformed monster!  Red Skull!


5-2 to the Americans.  Thanks for the game Gwen!